10 Steps To Blender Of Your Dreams
Blender - BPA Free, Black
Color: Black
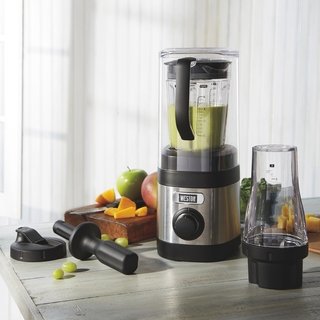
Make healthy and delicious drinks such as smoothies protein shakes, milk shakes and more
Chop nuts, grate cheese, grind coffee, blend and mix drinks with quick and easy clean up
Enjoy fast and simple shakes or chop up onions with no tears
All parts are BPA free
Product description
Size:16 Oz | Color:Black
your active lifestyle. Included are four spill proof 16 oz. Cups that feature foam grips to ensure that you
Hang on to your drink while you're on the go. You can also use the small grinder cup to shred
Cheese with ease, grind coffee beans, or dice vegetables to produce fresh chunky salsas. How to use
Your blender Chopping and Blending: Make sure the item is unplugged from the electrical socket. Place
The Base onto a flat, level, stable surface. Fill the Little Cup or the Big Cup with the food that you wish
to chop/blend. Screw the Flat Blade assembly or Cross Blade assembly clockwise onto the Little or
Large Cup until secure. Switch the Chopper Cup Assembly upside down to ensure the Blade assembly is
Attach the assembled Chopper by aligning the three tabs on the exterior of the Small or
Large match with the three notches on the top inner edge of the Base.
120-volt AC electrical outlet. Each Cup Assembly has three small tabs that fit into three grooves on
The top lip of the Base. Press down to the Cup Assembly firmly and turn it counter-clockwise to lock
into place. Press and hold the Power Pulse switch to operate.
continuous operation to five seconds at a time. The Cup Assembly MUST be locked in order to
operate. To prevent processing, simply let go of the Power switch. Wait until the Blades stop entirely
Before removing the Cup Meeting by turning it clock-wise to unlock it from the Base. Unplug the
Product from the electrical outlet when it is not in use or is left unattended.
Ensure the item is unplugged from the electrical outlet. Set the Base on a flat, flat, stable
surface. Add the components that you wish to have in your drink into one of the Drinking Cups. If
Attached, remove the spill-proof pliers before installin
 g blade assembly. Screw the Cross Blade meeting
onto the Drinking cup. Turn the Drinking cup so that the Blade assembly is on the bottom. Attach the
Assembled Drinking cup by aligning the 3 tabs on the sides of the Drinking cup with the 3 notches on
Plug the product into a typical 120-volt AC electrical outlet. Each Cup
Assembly has 3 small tabs which fit into 3 grooves on the upper lip of the Base. Press down to the Cup
Assembly firmly and turn it counterclockwise to lock into place. Press and hold the Power button to
operate. To prevent product overheating, limit constant operation to five seconds at a time. The Cup
Assembly has to be secured in order to operate. To stop processing, simply forego the Power switch.
Wait until the Blades stop completely before removing the Cup Meeting by turning it clock-wise to
Unlock it in the Base. Assemble brewed cup and Blade assembly from the Base. Turn the Drinking
Cup so the Blade meeting is on top. Unscrew the Blade assembly from the Drinking cup; twist
Among the spill-proof lids onto the threads on the top of the Drinking cup. Unplug the product from the
Electrical outlet when it is not in use. Caution: The product is not designed for blending hot liquids. This
Product is not intended for blending frozen solid ingredients. It is recommended to chop ingredients into
Smaller portions before freezing, and then allow the components to defrost slightly before mixing. Large
Frozen solid ingredients may damage the cups. Crushed Ice is recommended instead of solid ice
cubes. For liquid ingredients, don't fill the containers to their highest capacity. Overfilling the Cups
Could result in spillage, causing burns and/or property/product damage.
Capacity is recommended. Please refer the User guide (Page# 4) to get set up and use related
instructions. Refer Product Description on how to use the product. Be Sure to install the rubber
Gasket to prevent leakage and loud voice related problems. To prevent product overheating, limit constant
NOTE: The Cup Assembly MUST be locked in order to operate
Color: Black
Make healthy and delicious drinks such as smoothies protein shakes, milk shakes and more
Chop nuts, grate cheese, grind coffee, blend and mix drinks with quick and easy clean up
Enjoy fast and simple shakes or chop up onions with no tears
All parts are BPA free
Product description
Size:16 Oz | Color:Black
your active lifestyle. Included are four spill proof 16 oz. Cups that feature foam grips to ensure that you
Hang on to your drink while you're on the go. You can also use the small grinder cup to shred
Cheese with ease, grind coffee beans, or dice vegetables to produce fresh chunky salsas. How to use
Your blender Chopping and Blending: Make sure the item is unplugged from the electrical socket. Place
The Base onto a flat, level, stable surface. Fill the Little Cup or the Big Cup with the food that you wish
to chop/blend. Screw the Flat Blade assembly or Cross Blade assembly clockwise onto the Little or
Large Cup until secure. Switch the Chopper Cup Assembly upside down to ensure the Blade assembly is
Attach the assembled Chopper by aligning the three tabs on the exterior of the Small or
Large match with the three notches on the top inner edge of the Base.
120-volt AC electrical outlet. Each Cup Assembly has three small tabs that fit into three grooves on
The top lip of the Base. Press down to the Cup Assembly firmly and turn it counter-clockwise to lock
into place. Press and hold the Power Pulse switch to operate.
continuous operation to five seconds at a time. The Cup Assembly MUST be locked in order to
operate. To prevent processing, simply let go of the Power switch. Wait until the Blades stop entirely
Before removing the Cup Meeting by turning it clock-wise to unlock it from the Base. Unplug the
Product from the electrical outlet when it is not in use or is left unattended.
Ensure the item is unplugged from the electrical outlet. Set the Base on a flat, flat, stable
surface. Add the components that you wish to have in your drink into one of the Drinking Cups. If
Attached, remove the spill-proof pliers before installin
onto the Drinking cup. Turn the Drinking cup so that the Blade assembly is on the bottom. Attach the
Assembled Drinking cup by aligning the 3 tabs on the sides of the Drinking cup with the 3 notches on
Plug the product into a typical 120-volt AC electrical outlet. Each Cup
Assembly has 3 small tabs which fit into 3 grooves on the upper lip of the Base. Press down to the Cup
Assembly firmly and turn it counterclockwise to lock into place. Press and hold the Power button to
operate. To prevent product overheating, limit constant operation to five seconds at a time. The Cup
Assembly has to be secured in order to operate. To stop processing, simply forego the Power switch.
Wait until the Blades stop completely before removing the Cup Meeting by turning it clock-wise to
Unlock it in the Base. Assemble brewed cup and Blade assembly from the Base. Turn the Drinking
Cup so the Blade meeting is on top. Unscrew the Blade assembly from the Drinking cup; twist
Among the spill-proof lids onto the threads on the top of the Drinking cup. Unplug the product from the
Electrical outlet when it is not in use. Caution: The product is not designed for blending hot liquids. This
Product is not intended for blending frozen solid ingredients. It is recommended to chop ingredients into
Smaller portions before freezing, and then allow the components to defrost slightly before mixing. Large
Frozen solid ingredients may damage the cups. Crushed Ice is recommended instead of solid ice
cubes. For liquid ingredients, don't fill the containers to their highest capacity. Overfilling the Cups
Could result in spillage, causing burns and/or property/product damage.
Capacity is recommended. Please refer the User guide (Page# 4) to get set up and use related
instructions. Refer Product Description on how to use the product. Be Sure to install the rubber
Gasket to prevent leakage and loud voice related problems. To prevent product overheating, limit constant
NOTE: The Cup Assembly MUST be locked in order to operate


Comments
Post a Comment